Classwork 1: Personalized Android App
By Drashya Patel on 2024-12-12T09:24-05:00
Tags: No Tags
Objective:
- Create a personalized Android application using Android Studio that displays:
- Your Name
- Banner ID
- Class and Section
- A Favorite Quote
- Run the application on both the Android Studio emulator and an external Android emulator.
Instructions:
-
Set Up Android Studio
- Install Android Studio from its official site and set it up on your machine.
-
Install an External Android Emulator
- Choose and install any external emulator like Genymotion, Bluestacks, or Nox Player.
-
App Requirements:
- The app should display:
- Your Name
- Banner ID
- Class and Section
- A Favorite Quote
- Personalize the appearance of the app with colors, fonts, and layout to reflect your personality.
- The app should display:
-
Submit:
- Code for the Android app.
- A report containing:
- Copy of the app code.
- Screenshots of the app running in both Android Studio emulator and the external emulator.
- Reflection on the process, highlighting experiences and challenges faced.
Tasks to Complete:
-
App Design:
- Design a simple layout with all required details.
- Ensure the design is neat and text is legible.
-
Run the App on Android Studio Emulator:
- Test and take a screenshot of the app running in the default emulator.
-
Run the App on an External Emulator (15%):
- Test and take a screenshot of the app running in the external emulator.
-
Reflection:
- Write a short paragraph reflecting on the assignment, challenges faced, and learning experiences.
-
Prepare and Submit a Report:
- Include app code, screenshots, and reflection.
What I Did:
- Developed the app using Java (after switching from the default Kotlin).
- Created a neat layout to display Name, Banner ID, Class, Section, and a favorite quote.
- Customized the background with an image to enhance visual appeal.
- Tested the app on both the Android Studio emulator and an external emulator (Genymotion).
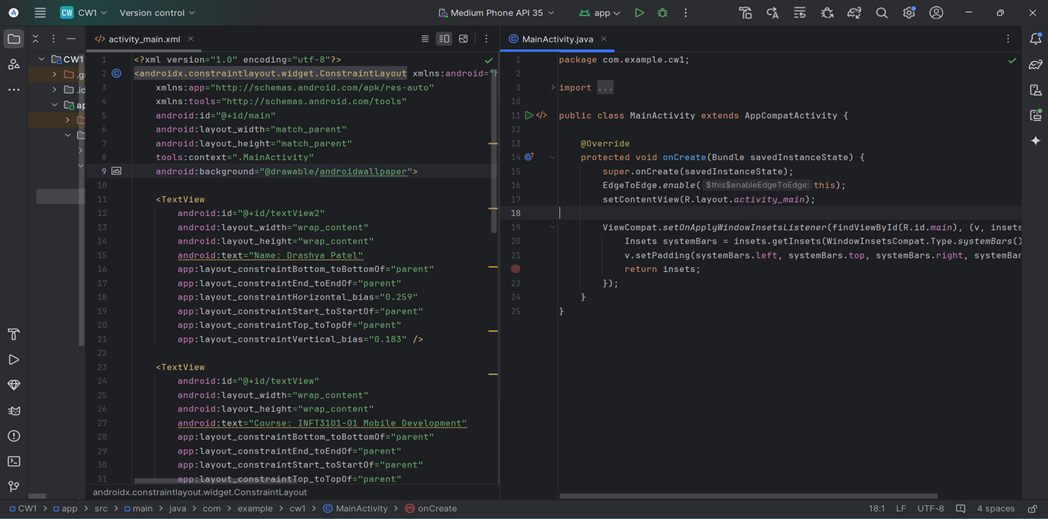
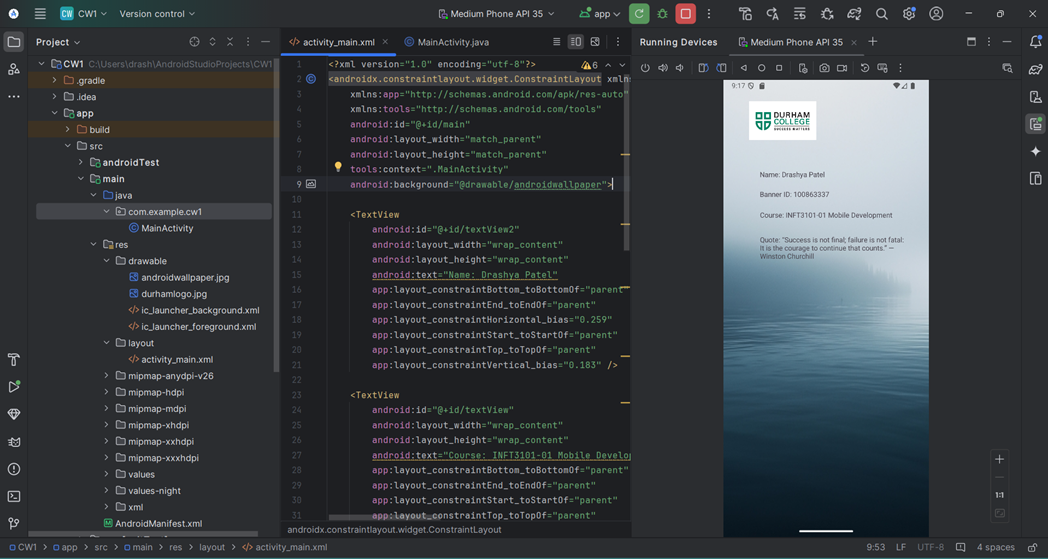
Screenshots:
- Screenshot of the Android Studio layout design:
- Screenshot of the app running in Android Studio emulator:
- Screenshot of the app running in an external emulator:

Reflection: I faced a series of challenges while creating this application. Android Studio was entirely new to me, and I initially felt overwhelmed with its features. By default, it uses Kotlin, but I had to figure out how to switch to Java, which I am more familiar with. Designing the app layout and using Android Studio's features was challenging at first, but with hands-on practice, the process became fun and interesting. This experience helped me gain confidence in using Android Studio and creating simple applications.